Red Beans and Rice

Cooks Illustrated-  very good 8/10

Red Beans and Rice

Why This Recipe Works
To replicate this traditional red beans and rice recipe from New Orleans using ingredients easily found in supermarkets across the country, we made some simple substitutions: small red beans for Camellia-brand dried red beans and bacon for hard-to-find tasso. Fine-tuning the proportions of sautéed green peppers, onions, and celery gave the recipe balance, and the right ratio of chicken broth to water added complexity without giving the dish an overpowering chicken flavor.

  • Table salt
  • 1 pound small red beans (about 2 cups), rinsed and picked over
    4 slices bacon (about 4 ounces), chopped fine (see note) (I used 6oz turkey bacon)
    1 medium onion, chopped fine (about 1 cup)
    1 small green bell pepper, seeded and chopped fine (about 1/2 cup)
    1 celery rib, chopped fine (about 1/2 cup)
    3 medium garlic cloves, minced or pressed through garlic press (about 1 tablespoon)
    1 teaspoon fresh thyme leaves
    1 teaspoon sweet paprika (see note)
    2 bay leaves
    ¼ teaspoon cayenne pepper
  • Ground black pepper
    3 cups low-sodium chicken broth
    6 cups water
    8 ounces andouille sausage, halved lengthwise and cut into 1/4-inch slices (see note) (I used turkey andouille)
  • Basic White Rice (see related recipe)
    1 teaspoon red wine vinegar, plus extra for seasoning
    3 scallions, white and green parts, sliced thin
  • Hot sauce (optional)

Instructions
Serves 6 to 8
If you are pressed for time you can “quick-brine” your beans. In step 1, combine the salt, water, and beans in a large Dutch oven and bring to a boil over high heat. Remove the pot from the heat, cover, and let stand 1 hour. Drain and rinse the beans and proceed with the recipe. If you can’t find andouille sausage, substitute kielbasa. Tasso can be difficult to find, but if you use it, omit the bacon and paprika in step 2 and cook 4 ounces finely chopped tasso in 2 teaspoons vegetable oil until lightly browned, 4 to 6 minutes, then proceed with the recipe. In order for the starch from the beans to thicken the cooking liquid, it is important to maintain a vigorous simmer in step 2. The beans can be cooled, covered tightly, and refrigerated for up to 2 days. To reheat, add enough water to the beans to thin them slightly.
1. Dissolve 3 tablespoons salt in 4 quarts cold water in large bowl or container. Add beans and soak at room temperature for at least 8 hours and up to 24 hours. Drain and rinse well.

2. Heat bacon in large Dutch oven over medium heat, stirring occasionally, until browned and almost fully rendered, 5 to 8 minutes. Add onion, green pepper, and celery; cook, stirring frequently, until vegetables are softened, 6 to 7 minutes. Stir in garlic, thyme, paprika, bay leaves, cayenne pepper, and 1/4 teaspoon black pepper; cook until fragrant, about 30 seconds. Stir in beans, broth, and water; bring to boil over high heat. Reduce heat and vigorously simmer, stirring occasionally, until beans are just soft and liquid begins to thicken, 45 to 60 minutes.

3. Stir in sausage and 1 teaspoon red wine vinegar and cook until liquid is thick and beans are fully tender and creamy, about 30 minutes. Season to taste with salt, black pepper, and additional red wine vinegar. Serve over rice, sprinkling with scallions and passing hot sauce separately, if desired.
Keys to Better Red Beans

THE RIGHT BEANS
Small red beans cooked up creamier than kidney beans and were easier to find than the authentic Camellia beans.

OVERNIGHT BRINE
Salting the dried beans during their overnight rehydration session kept them well seasoned and smooth-textured.

ACID REDUX
Adding red wine vinegar at two different points during the cooking process provided all the bright acidity of traditional “pickle meat”

Creole Bread Pudding with Bourbon Créme Anglaise

Notes

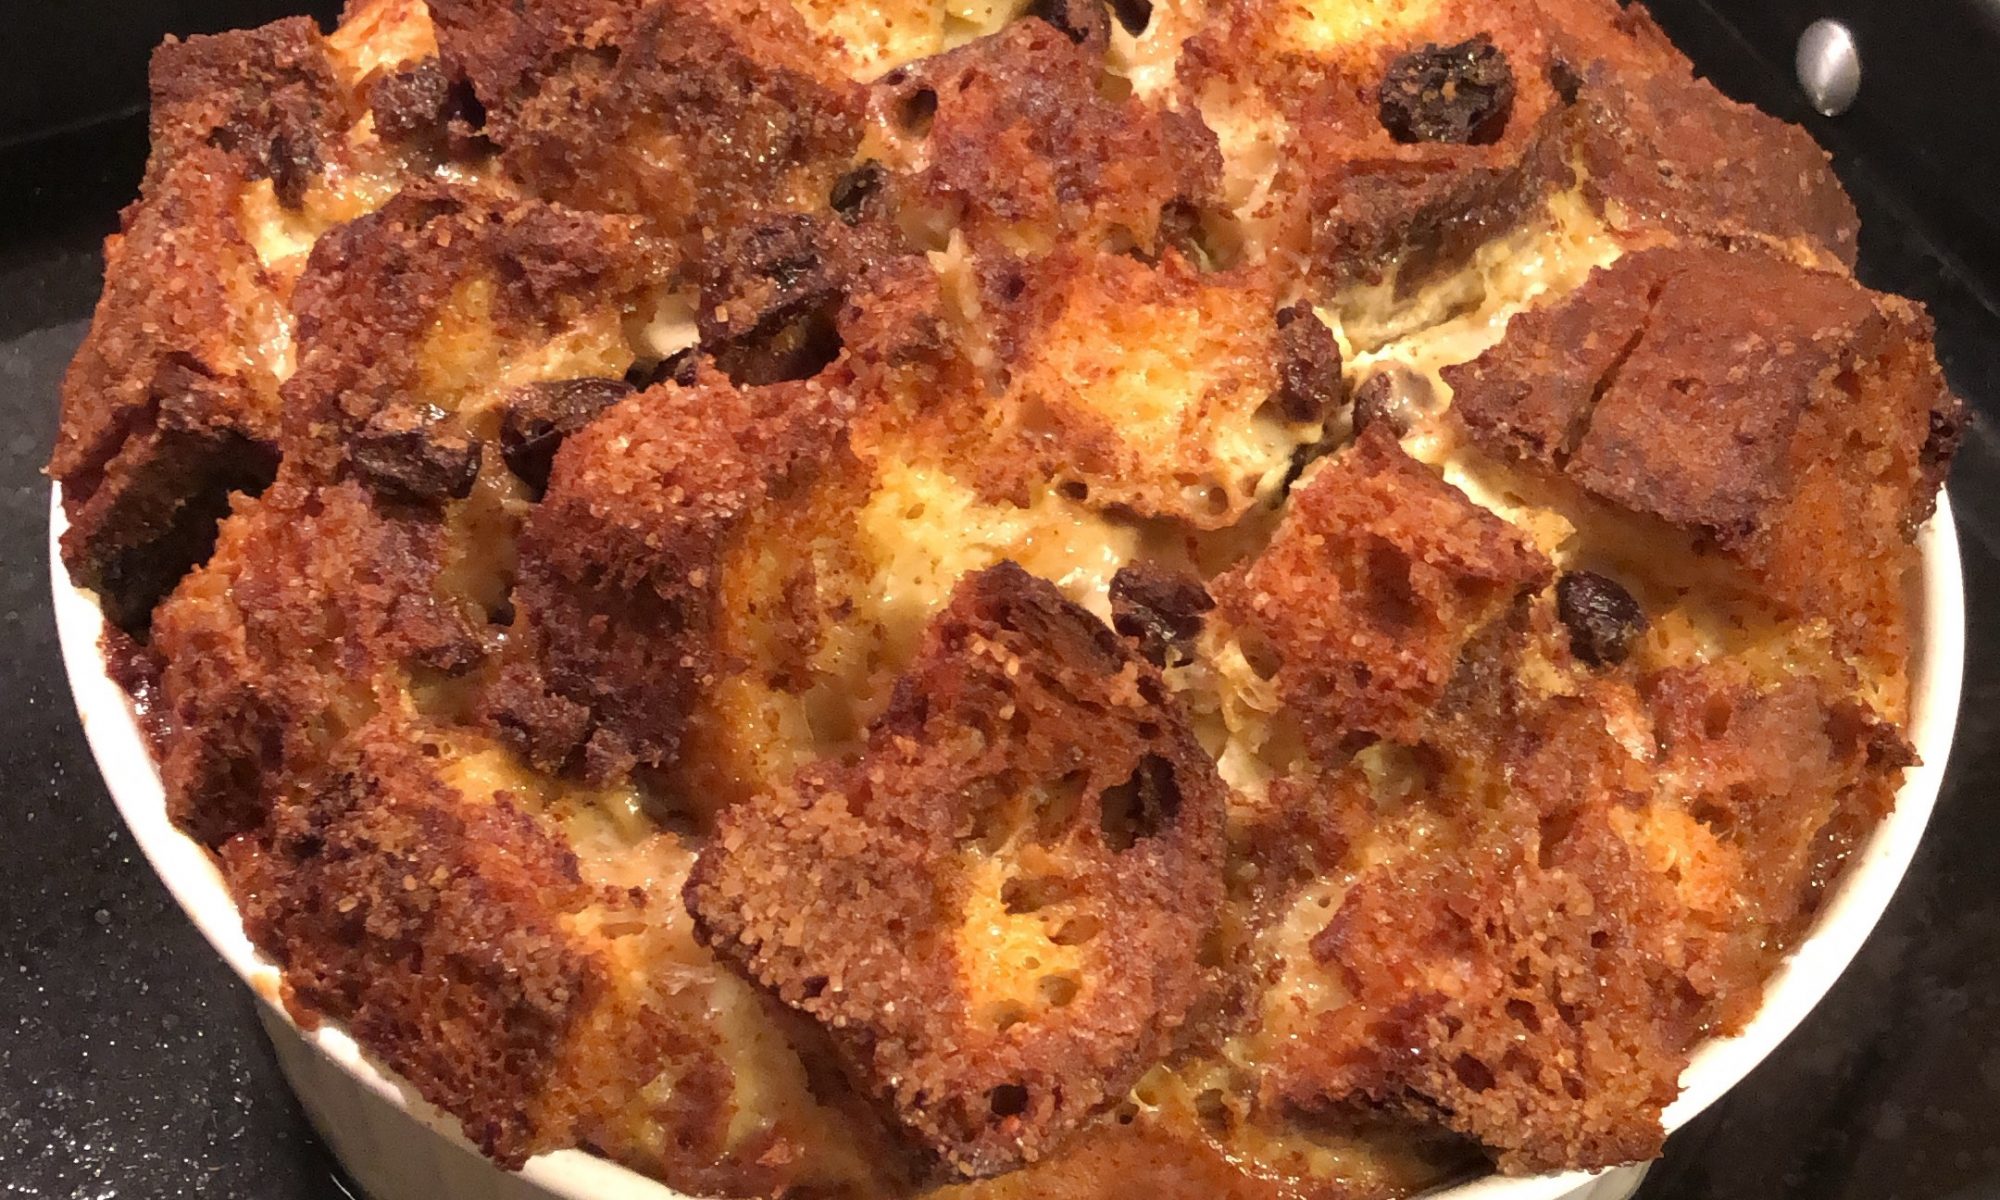
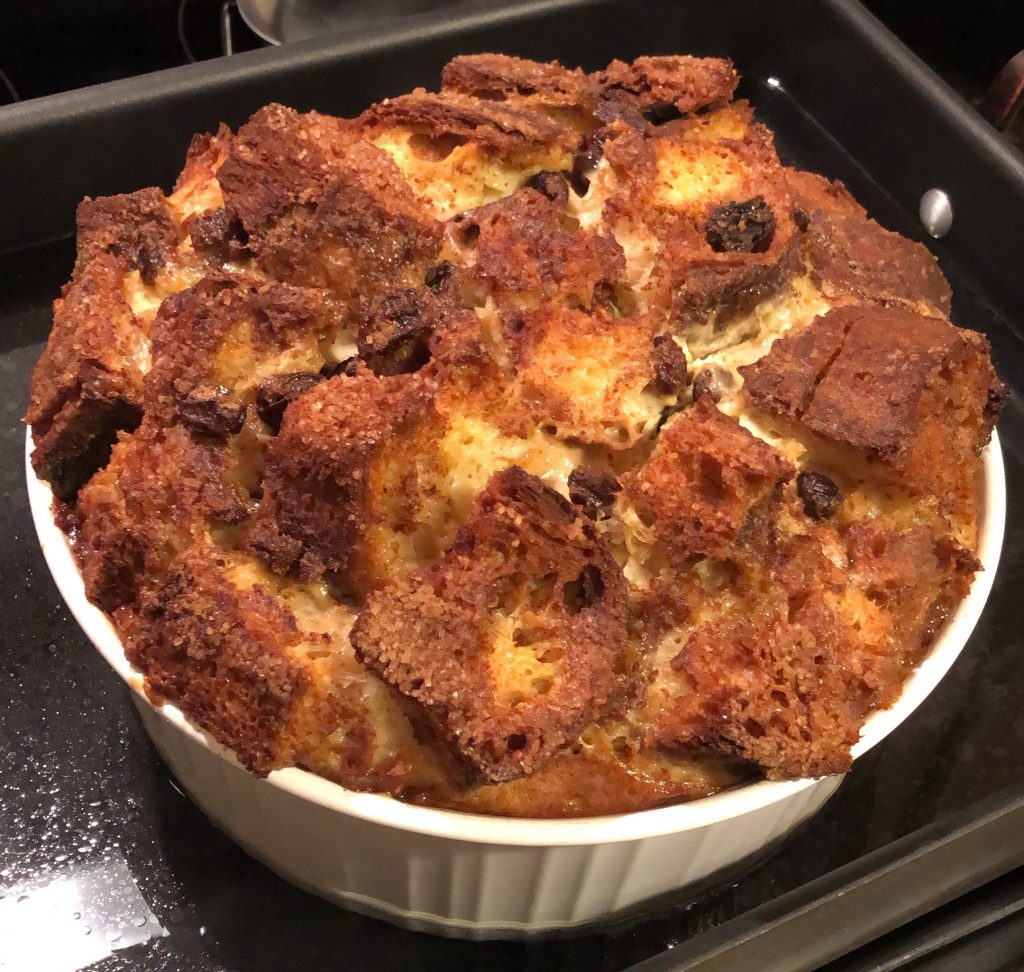
I haven’t even tried this yet, but it looks amazing! I used turbinado sugar to coat the top because I thought it would give a darker, caramel-like color and a more rich-flavored crust.

This recipe calls for putting the mixture into 8 ramekins, and there was just no way I was going to have any part of that. As a result I knew I would have to bake it much longer,  and even then greatly under-estimated how much longer it would take. I asked Ashley to take over for the last couple of steps.

She was afraid the top would burn with the extra bake time, so she put a piece of loose aluminum foil over the top and raised the temperature from the suggested 325°F to 350°F and baked it for another solid 30 minutes before taking it out to cool.

Enjoy!

Creole Bread Pudding

Ingredients

  • 10 large eggs
  • 2 ¾ cups whole milk
  • 2 ¾ cups heavy cream
  • 1 cup granulated sugar
  • 1 ½ tsp. ground cinnamon
  • ½ tsp. freshly ground nutmeg
  • ¼ tsp. kosher salt
  • 8 oz. day-old thin-crusted white bread (such as New Orleans-style French or Italian bread), cut into 1-inch cubes (about 8 cups)
  • ¾ cup raisins
  • 1 ¼ oz. (2 ½ Tbs.) unsalted butter, cut into small pieces

Directions

  1. Whisk the eggs in a large measuring cup or bowl with a spout until lightly beaten.
  2. Whisk in the milk, cream, ¾ cup of the sugar, ¾ tsp. of the cinnamon, the nutmeg, and salt until the sugar dissolves.
  3. Divide the bread and raisins evenly among twelve 6-oz. ramekins. Pour the custard over the top of each ramekin until almost full. Submerge the bread to help soak up the custard. Let sit for 10 minutes, then pour any remaining custard into the ramekins until almost full.
  4. Cover and refrigerate for at least 4 and up to 12 hours.
  5. Let the puddings sit at room temperature for 1 ½ hours.
  6. Position a rack in the center of the oven and heat the oven to 325°F. Mix the remaining ¼ cup sugar and ¾ tsp. cinnamon in a small bowl.
  7. Evenly dot the tops of the puddings with the butter and sprinkle them with the cinnamon sugar.
  8. Set the ramekins in a shallow roasting pan and add enough boiling water to come halfway up the sides.
  9. Bake until browned on top and a knife inserted in the center comes out barely clean, about 40 minutes.
  10. Let the puddings cool on a rack for at least 15 minutes before serving warm or at room temperature.

Bourbon Créme Anglaise

Ingredients

  • 1 vanilla bean
  • 2 cups whole milk
  • ⅓ cup granulated sugar
  • 6 large egg yolks
  • ¼ cup bourbon

Directions

  1. Split the vanilla bean lengthwise and scrape its seeds into a 2-quart saucepan, then add the pod and the milk. Bring to a simmer over medium heat, stirring once or twice with a wooden spoon.
  2. Meanwhile, whisk the sugar and egg yolks in a medium bowl until the sugar dissolves and the mixture is pale yellow.
  3. Whisk a little of the hot milk into the yolk mixture to warm it, and then slowly whisk in the rest of the milk. Pour the milk-yolk mixture back into the saucepan, turn the heat down to low, and cook, stirring and scraping into the corners of the pan, until the mixture thickens enough to coat the back of a wooden spoon and holds a trail when you run your finger across it (an instant-read thermometer should register from 170°F – 175°F), about 2 minutes.
  4. Immediately strain through a fine-mesh sieve into a medium bowl.
  5. Fill a large bowl with a few inches of ice water, then set the bowl of crème anglaise into the ice bath to quickly chill it. Stir occasionally until cool, about 5 minutes. Stir in the bourbon.
  6. Serve right away or refrigerate for up to 1 week in an airtight container with a piece of plastic wrap directly on the surface of the sauce to prevent a skin from forming.

Caramel Chocolate Marshmallow Cookie Bars

https://www.sugarsaltmagic.com/caramel-chocolate-marshmallow-cookie-bars/

I’m all about candy. Any type really. Fudge, marshmallows, chewy lollies, jubes – I love them all but marshmallows have always been one of my favourites. I’ve been known to sit with a bag of marshmallows, a skewer and a lit candle and toast my own marshmallows in front of the TV. True story. In fact, I haven’t done it in a while and I’ve just reminded myself to do it again.

Anyway, of course I couldn’t stop at just making Caramallows because, well, I have a hard time reining my ideas in. It felt to me like they would just be perfect with a bit of crunchy cookie and covered in chocolate. Am I right?


Anyway, Caramel Chocolate Marshmallow Cookie Bars (try and say that three times fast – I dare ya. Haha) are way easier than the name suggests. I love a simple recipe as much as the next person.
The cookie base is a no bake cookie – my favourite kind.
The marshmallows are store-bought, of the giant campfire variety.
The caramel is all homemade and chewy and perfect
Then that chocolate is just, well, melted chocolate.

Report this ad

Plus, anything with marshmallows is so much fun – Raspberry Coconut Marshmallow Slice, Chocolate Marshmallow Brownies and my Giant Homemade Wagon Wheel Slice to name a few. These are fun to put together and fun to eat too.


Save

Caramel tips
Make caramel from scratch doesn’t need to be scary. Read these really important steps to avoid to risk of crystallising your caramel. Crystallisation = Bad.

Report this ad

Do not use a non-stick saucepan – the caramel will crystallise, breaking a little bit of your heart at the same time
Use a stainless steel saucepan that is super clean – If there is any minor trace of grease, the caramel will crystallise, breaking a little bit of your heart at the same time. To be really sure run a cut lemon around the inside to remove any traces of grease and rinse.
Make sure the sugar dissolves fully before bringing it to a boil – if it doesn’t the caramel will crystallise, breaking a little bit of your …. you know the story
While you’re melting the sugar, use a wet pastry brush now and then to dissolve any sugar crystals on the side. If you don’t, the caramel will see those little crystals as a foreign body and crystallise.
Once the sugar comes to a boil leave it alone, don’t touch it until it’s golden brown and you’re ready to add the butter and cream and – tadaaa – caramel.
Click here to pin this recipe for later!


Save

Happy, not baking ?

Report this ad


HAVE YOU TRIED THIS RECIPE?
Rate it below or comment with any questions or thoughts.

GET NEW RECIPES DELIVERED STRAIGHT TO YOUR EMAIL INBOX subscribe here.
In addition to new posts you’ll receive monthly newsletters, and a free ebook. Plus any other freebies I come up with along the way.


{“@context”:”http:\/\/schema.org\/”,”@type”:”Recipe”,”name”:”Caramel Chocolate Marshmallow Cookie Bars”,”author”:{“@type”:”Person”,”name”:”Marie”},”description”:”Caramel Chocolate Marshmallow Cookie Bars \u2013 it may be a long name but these no bake cookie bars, filled with marshmallow, chewy caramel and covered in chocolate deserve it.”,”datePublished”:”2018-07-19T04:30:03+00:00″,”image”:[“https:\/\/i0.wp.com\/www.sugarsaltmagic.com\/wp-content\/uploads\/2018\/07\/Caramel-Chocolate-Marshmallow-Cookie-Bars-2.jpg?fit=680%2C1020&ssl=1″,”https:\/\/i0.wp.com\/www.sugarsaltmagic.com\/wp-content\/uploads\/2018\/07\/Caramel-Chocolate-Marshmallow-Cookie-Bars-2.jpg?resize=500%2C500&ssl=1″,”https:\/\/i0.wp.com\/www.sugarsaltmagic.com\/wp-content\/uploads\/2018\/07\/Caramel-Chocolate-Marshmallow-Cookie-Bars-2.jpg?resize=500%2C375&ssl=1″,”https:\/\/i0.wp.com\/www.sugarsaltmagic.com\/wp-content\/uploads\/2018\/07\/Caramel-Chocolate-Marshmallow-Cookie-Bars-2.jpg?resize=480%2C270&ssl=1″],”recipeYield”:”16 pieces”,”prepTime”:”PT10M”,”cookTime”:”PT20M”,”totalTime”:”PT30M”,”recipeIngredient”:[“250 g (8.8oz) digestive biscuits or similar (I use Arnotts granita)”,”100 g (3.5oz) unsalted butter, melted”,”280 g (9.8oz) vanilla marshmallows ((notes))”,”300 g (1 1\/2 cups \/ 10.5oz) white sugar”,”1\/3 cup water”,”113 g (1\/2 cup \/ 1 stick) unsalted butter”,”1\/2 cup thickened or heavy cream”,”300 g (10.5oz) milk chocolate”],”recipeInstructions”:[{“@type”:”HowToSection”,”name”:”For the base”,”itemListElement”:[{“@type”:”HowToStep”,”text”:”Grease and line a 6cm deep, 22cm square brownie tin with baking paper.”},{“@type”:”HowToStep”,”text”:”Blitz the biscuits to crumbs in a food processor. Add the melted butter and mix well. Press the mixture into the base of the prepared tin.”}]},{“@type”:”HowToSection”,”name”:”To make the caramel”,”itemListElement”:[{“@type”:”HowToStep”,”text”:”Using a heavy based saucepan over very low heat, dissolve the sugar into the water while gently stirring. Make sure not to splash sugar up the sides of the pan. If you do, just use a clean pastry brush with a little water to dissolve it.”},{“@type”:”HowToStep”,”text”:”Once the sugar has dissolved completely, stop stirring, remove the spoon, turn the heat up to medium-low and bring the mixture to a slow boil. Let it boil for roughly 10-15 minutes until the syrup turns a deep amber colour.”},{“@type”:”HowToStep”,”text”:”Add the butter and stir until melted.”},{“@type”:”HowToStep”,”text”:”Now add the cream and stir well.”},{“@type”:”HowToStep”,”text”:”Bring the caramel back to a boil for around 6-7 minutes, stirring every so often until the mixture thickens and is a dark golden brown colour.”},{“@type”:”HowToStep”,”text”:”Drizzle a little of the caramel over the biscuit base, then place the marshmallows over the top, pressing them quite close together.”},{“@type”:”HowToStep”,”text”:”Pour the remaining caramel over the top allowing it to drizzle down into the gaps. Place in the fridge for at least 1\/2 an hour before proceeding.”}]},{“@type”:”HowToSection”,”name”:”For the topping”,”itemListElement”:[{“@type”:”HowToStep”,”text”:”Melt the chocolate in 30 second increments, stirring well between each burst until it is just melted.”},{“@type”:”HowToStep”,”text”:”Pour the melted chocolate over the top and spread out evenly. Place in the fridge until set.”}]}],”recipeCategory”:[“Dessert”,”Snack”,”Sweets”],”aggregateRating”:{“@type”:”AggregateRating”,”ratingValue”:”5″,”ratingCount”:”1″}}

Save
5 from 1 vote
Print
Caramel Chocolate Marshmallow Cookie Bars
Caramel Chocolate Marshmallow Cookie Bars – it may be a long name but these no bake cookie bars, filled with marshmallow, chewy caramel and covered in chocolate deserve it.
Course Dessert, Snack, Sweets

Prep Time 10 minutes


Cook Time 20 minutes
Setting time 2 hours
Total Time 30 minutes

Servings 16 pieces

Author Marie

Ingredients
The base
250 g (8.8oz) digestive biscuits or similar (I use Arnotts granita)
100 g (3.5oz) unsalted butter, melted
280 g (9.8oz) vanilla marshmallows (notes)
For the caramel
300 g (1 1/2 cups / 10.5oz) white sugar
1/3 cup water
113 g (1/2 cup / 1 stick) unsalted butter
1/2 cup thickened or heavy cream
Topping
300 g (10.5oz) milk chocolate
Instructions
For the base
Grease and line a 6cm deep, 22cm square brownie tin with baking paper.
Blitz the biscuits to crumbs in a food processor. Add the melted butter and mix well. Press the mixture into the base of the prepared tin.
To make the caramel
Using a heavy based saucepan over very low heat, dissolve the sugar into the water while gently stirring. Make sure not to splash sugar up the sides of the pan. If you do, just use a clean pastry brush with a little water to dissolve it.
Once the sugar has dissolved completely, stop stirring, remove the spoon, turn the heat up to medium-low and bring the mixture to a slow boil. Let it boil for roughly 10-15 minutes until the syrup turns a deep amber colour.
Add the butter and stir until melted.
Now add the cream and stir well.
Bring the caramel back to a boil for around 6-7 minutes, stirring every so often until the mixture thickens and is a dark golden brown colour.
Drizzle a little of the caramel over the biscuit base, then place the marshmallows over the top, pressing them quite close together.
Pour the remaining caramel over the top allowing it to drizzle down into the gaps. Place in the fridge for at least 1/2 an hour before proceeding.
For the topping
Melt the chocolate in 30 second increments, stirring well between each burst until it is just melted.
Pour the melted chocolate over the top and spread out evenly. Place in the fridge until set.
Recipe Notes
I use giant campfire marshmallows cut in half but you can use smaller sized marshmallows and not cut them.

Caramel Chocolate Marshmallow Cookie Bars

Caramel Chocolate Marshmallow Cookie Bars – it may be a long name but these no bake cookie bars, filled with marshmallow, chewy caramel and covered in chocolate deserve it.Course Dessert, Snack, Sweets Prep Time 10 minutes Cook Time 20 minutes Setting time 2 hours Total Time 30 minutes Servings16 pieces Author Marie 

Ingredients

The base

  • 250 g (8.8oz) digestive biscuits or similar (I use Arnotts granita)
  • 100 g (3.5oz) unsalted butter, melted
  • 280 g (9.8oz) vanilla marshmallows (notes)

For the caramel

  • 300 g (1 1/2 cups / 10.5oz) white sugar
  • 1/3 cup water
  • 113 g (1/2 cup / 1 stick) unsalted butter
  • 1/2 cup thickened or heavy cream

Topping

  • 300 g (10.5oz) milk chocolate

Instructions

For the base

  1. Grease and line a 6cm deep, 22cm square brownie tin with baking paper.
  2. Blitz the biscuits to crumbs in a food processor. Add the melted butter and mix well. Press the mixture into the base of the prepared tin.

To make the caramel

  1. Using a heavy based saucepan over very low heat, dissolve the sugar into the water while gently stirring. Make sure not to splash sugar up the sides of the pan. If you do, just use a clean pastry brush with a little water to dissolve it.
  2. Once the sugar has dissolved completely, stop stirring, remove the spoon, turn the heat up to medium-low and bring the mixture to a slow boil. Let it boil for roughly 10-15 minutes until the syrup turns a deep amber colour.
  3. Add the butter and stir until melted.
  4. Now add the cream and stir well.
  5. Bring the caramel back to a boil for around 6-7 minutes, stirring every so often until the mixture thickens and is a dark golden brown colour.
  6. Drizzle a little of the caramel over the biscuit base, then place the marshmallows over the top, pressing them quite close together.
  7. Pour the remaining caramel over the top allowing it to drizzle down into the gaps. Place in the fridge for at least 1/2 an hour before proceeding.

For the topping

  1. Melt the chocolate in 30 second increments, stirring well between each burst until it is just melted.
  2. Pour the melted chocolate over the top and spread out evenly. Place in the fridge until set.

Recipe Notes

  1. I use giant campfire marshmallows cut in half but you can use smaller sized marshmallows and not cut them.