Thai Coconut Sticky Rice With Mango (Khao Niao Mamuang)

Recipe taken from Serious Eats.

Notes

I didn’t use any fancy steamer/cheesecloth/towel concoction as recommended below; I did some research and the Instant Pot® or any decent rice cooker can make perfect sticky rice.

The recommendations I found suggested not to soak the rice (Step 1 below), but instead to rinse the rise the rice 3–4 times with cold water until the water does not appear too cloudy.  After that you can cook the sticky rice as you would any traditional rice in a rice cooker.

Ingredients

  • 1 cup Thai sweet sticky rice (7 ounces; 200g)
  • 1 (14-ounce; 400ml) can full-fat coconut milk, blended well to incorporate fat, divided
  • ½ cup sugar (3½ ounces; 100g), divided
  • Kosher salt
  • 2 teaspoons (6g) cornstarch
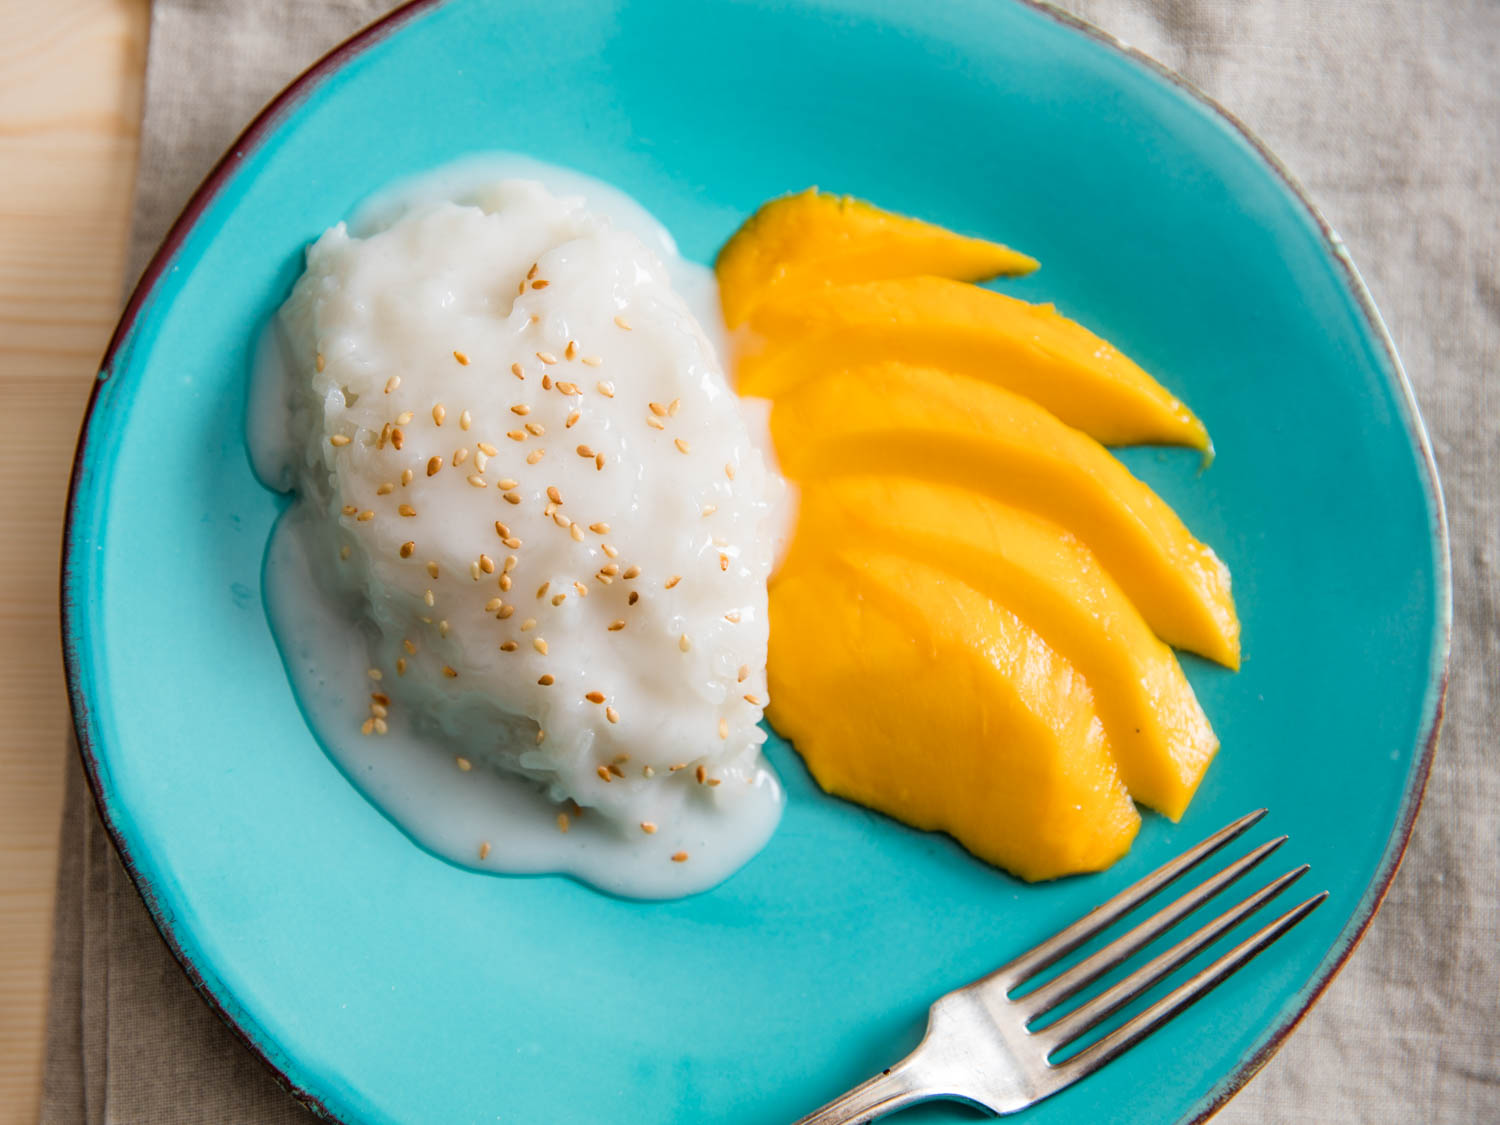
  • 2 Ataúlfo mangoes (about 6 ounces or 170g each), peeled, pitted, and sliced
  • Toasted sesame seeds, for garnish

Directions

  1. In a large bowl, cover rice with water by several inches and let stand at room temperature 1 hour or up to overnight. (If you plan on using the Istant Pot®, skip this step and instead rinse the rice with cold water a few times until it appears less cloudy).
  2. Drain rice. Assemble a steamer, line with cheesecloth or a clean kitchen towel, and add rice, smoothing surface to form an even layer. Set over high heat, bring water in steamer to a boil, cover, and cook until rice is tender, about 20 minutes. (Or just use the a rice cooker, or the Rice button on the Instant Pot®!)
  3. Meanwhile, in a small saucepan, bring half the coconut milk to a simmer over medium heat, stirring frequently. Whisk in 1/4 cup plus 2 tablespoons sugar and a large pinch of salt until dissolved. The coconut milk should taste salty-sweet.
  4. Transfer cooked rice to a large heatproof bowl and pour coconut milk mixture on top (it will look like too much liquid). Stir well to combine, cover with plastic, and let stand until liquid is absorbed, about 20 minutes. (You can let it stand up to 2 hours at room temperature.)
  5. Meanwhile, clean saucepan and add remaining coconut milk to it. Bring to a simmer over medium heat, stirring frequently. In a small bowl, combine cornstarch with a couple of teaspoons of the hot coconut milk and stir to form a slurry. Whisk cornstarch slurry into coconut milk and simmer until thickened, about 3 minutes. Whisk in remaining 2 tablespoons sugar and a large pinch of salt until dissolved. Keep coconut cream warm.
  6. When ready to serve, mound coconut rice onto plates and arrange sliced mango alongside. Drizzle coconut cream all over rice and garnish with toasted sesame seeds. Serve right away.

Bánh Bò Nướng: Vietnamese Honeycomb Cake

Bánh Bò Nướng: Vietnamese Honeycomb Cake

by Gina Planas

Ingredients

  • 200ml (½ can) of coconut milk
  • 1 cup white sugar (I use just a bit less)
  • About ⅓ of a 20mL bottle of Buko Pandan flavoring
  • 2 cups tapioca flour/starch
  • 2 ½ teaspoons of SINGLE ACTING baking powder*
  • 6 eggs

Instructions

  1. In a sauce pan over low heat, add the ½ can of coconut milk and the 1 cup sugar. You’re basically just melting the sugar here so it will only take a few minutes. Turn the heat off then add the Buko Pandan flavoring. I usually put about ⅓ of the small bottle, but it all depends on how much flavoring you want your cake to have. To me, ⅓ – ½ is just perfect.
  2. Let stand for about 10-15 minutes or whenever it totally cooled down.
    Preheat the oven at 350 degrees for about 15 minutes.
  3. In a mixing bowl, whisk the 6 eggs (don’t over beat the eggs).
  4. When the coconut milk/sugar mixture is completely cool, mix this to the beaten eggs along with the 2 cups of tapioca flour + 2 ½ teaspoon of single acting baking powder. Again, don’t over mix. The consistency should be watery.
  5. Pour the batter in a bundt or cake pan (sprayed liberally with cooking spray) and bake for 40-45minutes.**

Gina’s Tips

*Substitution for SINGLE-ACTING Baking Powder :

  • ¾ teaspoon baking soda
  • 1 ¼ teaspoon cream of tartar
  • ¾ teaspoon cornstarch

**I guess this will depend on your oven. I followed instructions in the past to bake it 50-60min and I noticed that the ends end up being way too dry while the inside is moist and chewy. So I started to experiment and lessened baking time, making the entire cake moist and chewy with no dry ends (of course if you prefer the first, you can bake longer so it’s up to your preference).

Coconut Key Lime Pie

Coconut Key Lime Pie
Recipe from blog A Cozy Kitchen

Ingredients:
1 cup finely ground graham cracker crumbs
2 tablespoons granulated sugar
1/4 teaspoon salt
6 tablespoon butter, melted
1 (15-ounce) can full-fat unsweetened coconut milk
1 1/2 teaspoons finely grated key lime zest (from about 4 key limes)
1/3 cup fresh key lime juice (from about 6 key limes)
5 large egg yolks
1 (14-ounce) can sweetened condensed milk
1/2 teaspoon salt
2 tablespoons sweetened or unsweetened coconut flakes
2 tablespoons powdered sugar
1 cup heavy cream

Directions:
1.  For the crust:  Preheat the oven to 350 degrees F. In a medium bowl, mix together the graham cracker crumbs, sugar, salt and butter. Pour the mixture into a standard 9-inch pie dish, making sure to press the crumbs up the sides and all over the bottom of the dish until you have a nice, even layer of crust.  Bake in the oven for 10 to 12 minutes, until lightly golden brown. Remove and set aside, letting the crust cool completely. Turn the oven down to 325 degrees F.

2. For the filling:  In a small bowl, set aside three tablespoons of the coconut cream that’s sitting at the top of the can of coconut milk. Place the bowl of coconut cream in the refrigerator to be used later as part of the topping. Stir the remaining coconut cream and coconut milk together, making sure to break up any large clumps. In a large bowl, whisk together the coconut milk, key lime zest, key lime juice, egg yolks, sweetened condensed milk and salt.

3. Place the cooled pie dish on a baking sheet and transfer to the middle rack of the oven. Pour in the filling and allow to bake for 45 to 50 minutes, until the top is firm to the touch yet still a wobbly. Once done, remove from the oven and let cool for approximately 10 minutes. Transfer the pie to the fridge letting it set for at least 2 hours. While the oven is still on, place the coconut flakes on a baking sheet and toast for about 5 minutes in the oven, until lightly golden brown. Set aside and turn oven off.

4. For the topping:   Right before serving add the reserved, refrigerated coconut cream and powdered sugar to the bowl of a stand-up mixer with the whisk attachment; beating approximately 2 minutes until smooth. With the mixer running, pour in about 2 tablespoons of heavy cream beating until incorporated. Slowly pour in the rest of the heavy cream until smooth and medium peaks form, about 2 minutes.

5. Spread the whipped cream on top of the pie, sprinkle the toasted coconut flakes on top, slice and serve.