Casey’s General Store Breakfast Pizza

Notes

Recipe taken from TheKitchn.com

Serves 6–8.

This recipe reads long, but you can make the cheese sauce, cook the sausage and eggs, and grate the cheese the night before and just assemble the pizza the next day.

Storage: Leftover pizza can be stored tightly wrapped in the refrigerator for up to 3 days. Reheat in an oven or toaster oven for best results.

Topping Shortcuts

  • Cheese sauce: You can make the cheese sauce the night before and store it in an airtight container. Or feel free to use a prepared product such as Cheese-Wiz instead.
  • Sausage: Bulk breakfast sausage is the way to go here. Cook it up the night before.
  • Eggs: I’m usually not an advocate for cooking scrambled eggs in advance, but between the cheese sauce and the cheese on top, the pre-cooked eggs will steam to reheat and won’t dry out in the oven. These can be cooked the night before as well.
  • Frozen hash browns: While homemade hash browns are tastier, using frozen hash brown potatoes and thawing them in the fridge overnight will save considerable prep time.

Ingredients

  • Cooking spray
  • 1 tablespoon unsalted butter
  • 1 tablespoon all-purpose flour
  • 1 ¼ cups whole milk, divided
  • ¾ cup shredded cheddar cheese, divided
  • ½ teaspoonkosher salt, divided
  • 8 ounces uncooked breakfast sausage, casings removed
  • 4 large eggs
  • 1 pound pizza dough, at room temperature
  • 1 cup frozen hash brown potatoes, thawed
  • 1 cup shredded mozzarella cheese
  • 2 scallions, thinly sliced

Equipment

  • Medium non-stick frying pan
  • Paper towel

Instructions

  1. Heat the oven. Arrange a rack in the middle of the oven and heat to 375°F. Coat a baking sheet with cooking spray.
  2. Make the cheese sauce. Melt the butter in a small saucepan over medium-high heat. Add the flour and cook, stirring, until the butter-flour mixture loses its sheen, about 1 minute. Whisk in 1 cup of the milk and bring to a boil, whisking occasionally, until thickened, 3 to 4 minutes. Remove from the heat and whisk in ½ cup of the cheddar cheese and ¼ teaspoon of the salt. Set aside to cool slightly while you make the rest of the toppings.
  3. Cook the sausage and eggs. Heat a medium nonstick frying pan over medium-high heat. Crumble the sausage into the pan and cook until browned and cooked through, 5 to 7 minutes. While the sausage cooks, whisk together the eggs, remaining ¼ cup of milk, and remaining ¼ teaspoon salt in a medium bowl. Use a slotted spoon to transfer the cooked sausage to a paper towel-lined plate. Leave the sausage’s fat in the pan and pour in the egg mixture. Scramble the eggs until almost cooked through but still moist, 3 to 4 minutes. Remove the pan from the heat.
  4. Roll and dock the pizza dough. Roll or stretch the pizza dough out into a 12-inch round. Transfer the dough to the baking sheet. Use the tines of a fork to “dock” (poke holes in) the pizza dough, working from the middle out to within 1 inch of the edge. This will prevent the dough from getting soggy from the steaming cheese sauce.
  5. Sauce the pizza. Spread on the cheese sauce in a thin, even layer as you would pizza sauce. You might not use all the cheese sauce.
  6. Top the pizza. Sprinkle the sausage onto the cheese sauce, followed by the hash browns, and finally the scrambled eggs. Sprinkle the pizza with the mozzarella cheese, remaining ¼ cup of cheddar cheese, and scallions.
  7. Bake for 20 to 25 minutes. Bake until the cheese is melted and and the crust is golden-brown, 20 to 25 minutes.
  8. Cool and slice. Let the pizza cool for 10 minutes; this gives the cheese sauce time to set and prevent it from oozing out. Transfer to a cutting board, slice, and serve.

Memphis-Style Dry Rub Barbecue Pork Ribs

Mouth-watering photo courtesy of @nyfoodiefamily (THANK YOU NANCY!)

Recipe & Process Notes

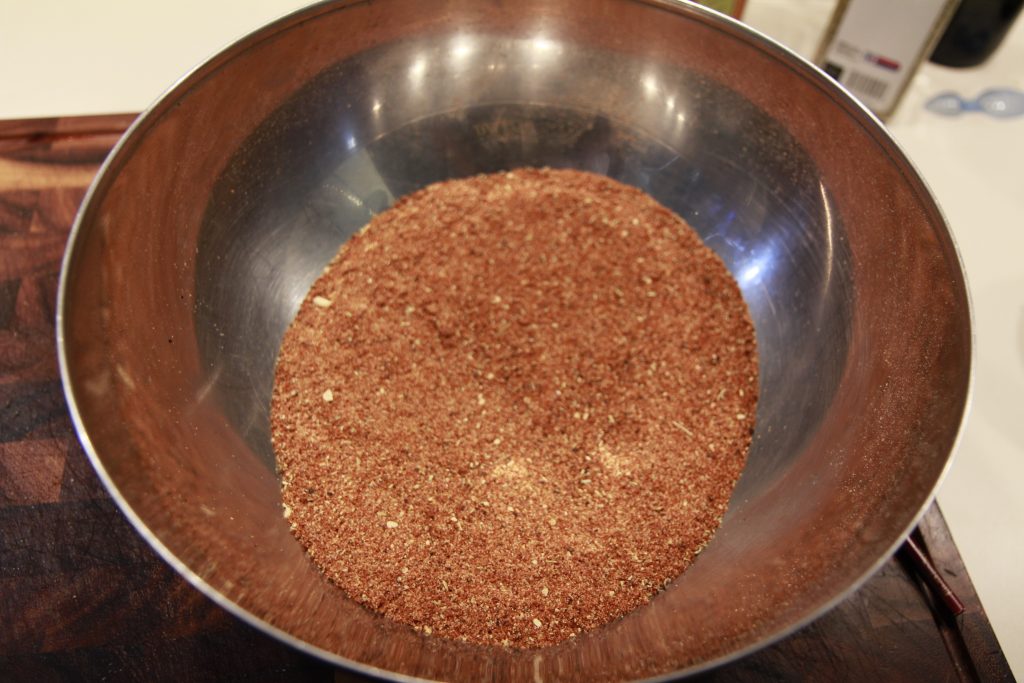
Ashley found some killer country-style pork ribs (the meatier kind) at the farmer’s market and this was a no-brainer. I really love Meathead’s Memphis Dust, so that’s what I used for the rub. The recipe below makes a large batch of it– we keep a large jar of it on hand.

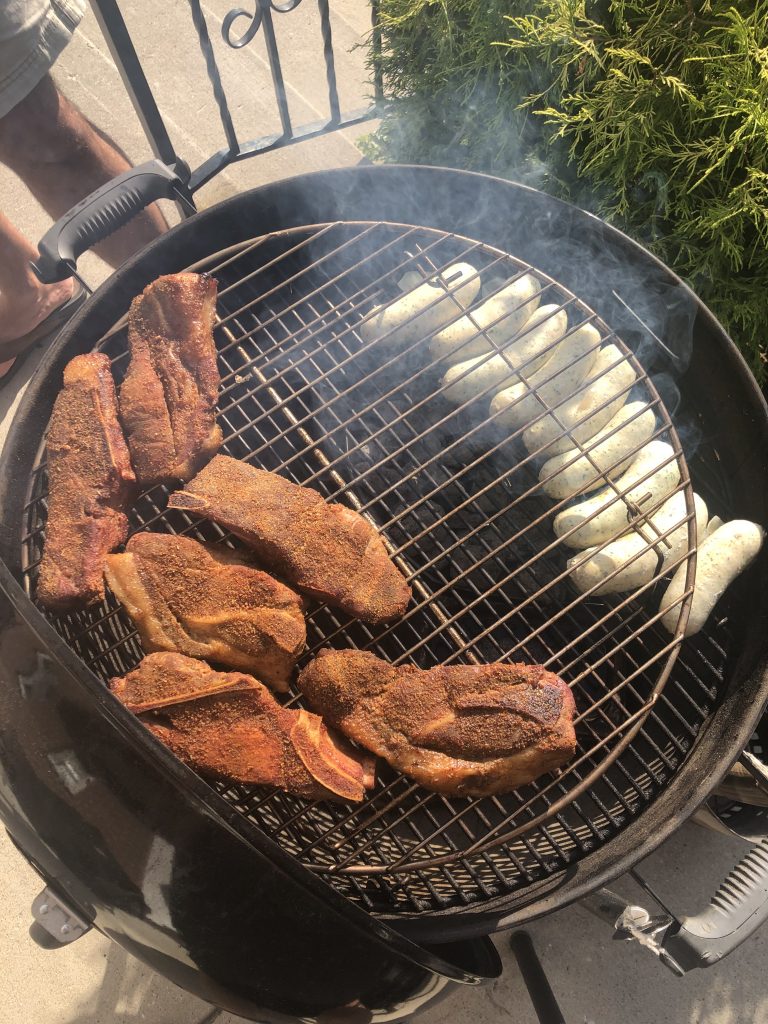
We heavily salted the ribs and let them chill for 12+ hours, then they took a warm sous vide bath for 36 hours. We chilled them and then they hit the charcoal smoker for 15 minutes on a relatively low heat. I seared them very briefly over the coals to let the sugar caramelize and form a bark before I served them (dry, with optional BBQ sauce on the side).

I thought they were delicious but perhaps a bit too dry. Apparently this is the way country-style ribs are– more meaty, less juicy. I might stick with baby back or another less-meaty rib style going forward.

Meathead’s Memphis Dust Dry Rub

Ingredients

  • ¾ cup firmly packed dark brown sugar
  • ¾ cup white sugar
  • ½ cup sweet paprika
  • ½ cup garlic powder
  • 2 tablespoons ground black pepper
  • 2 tablespoons ground ginger powder
  • 2 tablespoons onion powder
  • 2 teaspoons rosemary powder

Instructions

Meathead’s recipe notoriously is lacking salt. You can read his long explanation for this, but the TL:DR is that it’s a good practice to pat meat dry with paper towels and cover it with salt first before adding a dry rub. This makes it harder to over-salt the meat if you happen to go overboard with the rub. It’s also beneficial to dry brine certain cuts of meat by coating them with salt and letting them hang out in the fridge for a while.

  1. If you have time, sprinkle on ½ teaspoon of kosher salt per pound of meat up to 12 hours in advance.
  2. Mix the ingredients thoroughly in a bowl. If the sugar is lumpy, crumble the lumps by hand or on the side of the bowl with a fork. If you store the rub in a tight jar, you can keep it for months. If it clumps just chop it up, or if you wish, spread it on a baking sheet and put it in a 225°F oven for 15 minutes to drive off moisture. No hotter or the sugar can burn.
  3. If you plan on serving with a BBQ sauce, wet the surface of the meat with water and sprinkle just enough Meathead’s Memphis Dust on to color it.
  4. For Memphis-style ribs without a sauce, apply the rub thick enough to make a crunchy crust, perhaps 2 tablespoons per slab of St. Louis Cut (Center Cut) and a bit less for baby backs.
  5. To prevent contaminating your rub with uncooked meat juices, spoon out the proper amount before you start and seal the bottle for future use. “Keep your powder dry,” as the old expression goes. To prevent cross-contamination, one hand sprinkles on the rub and the other hand does the rubbing. Don’t put the hand that is rubbing into the powder or use it to hold the bottle.

Sous Vide Barbecue Pork Ribs

Recipe by J. Kenji López-Alt adapted from Serious Eats. I snipped the relevant bits for making Memphis-style, dry-rubbed, country-style pork ribs finished on a charcoal smoker

Cook Instructions

https://www.youtube.com/watch?v=d_fqJcc4n_I
  1. Remove the papery membrane on the back of the ribs, using a paper towel or kitchen towel to grip it and pulling it away in one piece. Divide each rack of ribs into three to four portions with three to four ribs each by cutting through the meat in between the ribs. Rub ribs generously on all sides with the remaining spice rub mixture. (Set aside 3 tablespoons spice rub if making dry-style ribs.)
  2. Place individual portions of rubbed ribs in vacuum bags. (Fold over the top of each bag while you add the ribs so that no rub or pork juices get on the edges of the bags, which can weaken the seal.) Add 4 drops (about 1/8 teaspoon) liquid smoke to each bag. Seal the bags, transfer to refrigerator, and let rest for 4 to 12 hours.
  3. Set your immersion circulator to 145°F (63°C) for extra-meaty ribs (or 165°F (74°C) for more traditionally textured ribs).
  4. Add ribs to the water bath and cover it with ping pong balls. Cook for 36 hours at 145°F (or 12 hours at 165°F for less meaty ribs). Transfer cooked ribs to a large bowl of water filled with ice to chill thoroughly. Ribs can be stored in the refrigerator at this stage for up to 5 days before finishing.

Finishing Instructions

  1. Remove ribs from vacuum bags and carefully pat dry with paper towels. Coat generously with more spice rub.
  2. Light one-half chimney full of charcoal (about 2 ½ quarts of coals). When all the charcoal is lit and covered with gray ash, pour out and arrange the coals on one side of the charcoal grate. Add any smoker chips or blocks directly to the lit coals. Set cooking grate in place, cover grill, and allow to preheat for 5 minutes.
  3. Scrape the grill grates clean with a grill scraper, then oil the grates by holding an oil-dipped kitchen towel or paper towels in a set of tongs and rubbing them over the grates 5 to 6 times.
  4. Place the ribs, facing up, over the cooler side of the grill. Cover and cook until ribs are heated through and dry to the touch, about 15 minutes.
  5. Transfer ribs to hotter side of grill and continue grilling, turning occasionally, until a crusty bark has formed, about 10 minutes. Serve.

Feijão Tropeiro (Brazilian Beans w/ Sausage & Collard Greens)

Notes

Recipe adapted from Olivia’s Cuisine.

Ingredients

  • 1 pound dry carioca (pinto) beans rinsed
  • 2 bay leaves, dried or fresh
  • 6 cups water
  • 1 bunch collard greens, rinsed and dried
  • 4 tablespoons olive oil, divided
  • 14 ounces Calabresa sausage, sliced (I substituted with Argentinian chorizo, but any smoked sausage will do)
  • 1/2 pound thick sliced bacon, diced
  • 1 large onion, sliced
  • 6 cloves of garlic, minced, divided
  • 5 eggs
  • 1 to 1 ½ cups toasted manioc flour (this turned out to be a completely different recipe, I did not make this! I toasted some panko bread crumbs instead.)
  • Salt and pepper to taste
  • Chopped parsley and green onions to taste

Instructions

  1. Start by cooking your beans. I used an Instant Pot for this. Combine the rinsed beans, 6 cups of water, and bay leaves to the pot. Secure the lid and cook on High Pressure for 15-20 minutes. Let the pressure release naturally release all the pressure naturally. Once the pressure is released, drain the water and set the beans aside
  2. Remove the stems of the collard greens leaves. Stack a few leaves on top of each other and roll that stack into a cylinder. Slice the collard greens into thin strips. Repeat with all the leaves.
  3. Place the oil in a medium-sized skillet over medium heat. Whisk the eggs in a bowl and add them to the pan. Cook, stirring gently, until they are scrambled. Reserve.
  4. Heat 2 tablespoons of olive oil in a large saute pan over medium heat. Add 3 cloves of garlic and cook, stirring often, until golden and fragrant, about 2 minutes. Add the collard greens and cook until withered, about 5 minutes. Season with salt and pepper and reserve.
  5. Using that same pan, over medium heat, heat 1 tablespoon of olive oil and brown the sausage until it starts to get crispy, about 5 minutes. Remove from the pan and reserve. Discard the fat.
  6. In the same pan, add the bacon and fry until golden brown, about 3 minutes. Then, stir in the onions and remaining garlic, cooking until translucent (about 3 more minutes). Add the drained beans and the sausage and cook for a minute, letting the beans soak up all those amazing flavors. Then, add the eggs and the collard greens, stirring until everything is well combined.
  7. Season generously with salt and pepper. Then, add the manioc flour (to taste), a handful at a time, stirring until it is moist and incorporated into the dish.
  8. Remove the pan from the heat and sprinkle the parsley and green onions. Serve immediately!