Red Rice and Quinoa Salad with Orange and Pistachios

made by Loren
Adapted from Yotam Ottolenghi’s!! recipe in Food & Wine.
Serves 6
Ingredients
1 tablespoon finely grated orange zest
1 cup quinoa
1 cup Bhutanese red rice
1/4 cup extra-virgin olive oil1 medium onion, thinly sliced
Salt and freshly ground pepper
1/3 cup fresh orange juice
1 tablespoon fresh lemon juice
1 garlic clove, minced
1/2 cup dried apricots (diced), cherries or cranberries
1-2 Navel Oranges, supremed and cut into small pieces
1 large or 2 small red beets
Bring 2 medium saucepans of salted water to a boil. I added 1 ½” chunks of beet to the red rice water, for color, removing them after it was sufficiently red, before adding the rice.Add the quinoa to 1 saucepan and the red rice to the other.
Cover and simmer over moderate heat until tender, about 12 minutes for the quinoa and 35 minutes for the rice. Drain the grains and spread them out on baking sheets to cool.
While grains are cooking, grate the rest of the beets and put aside.
Step 2   
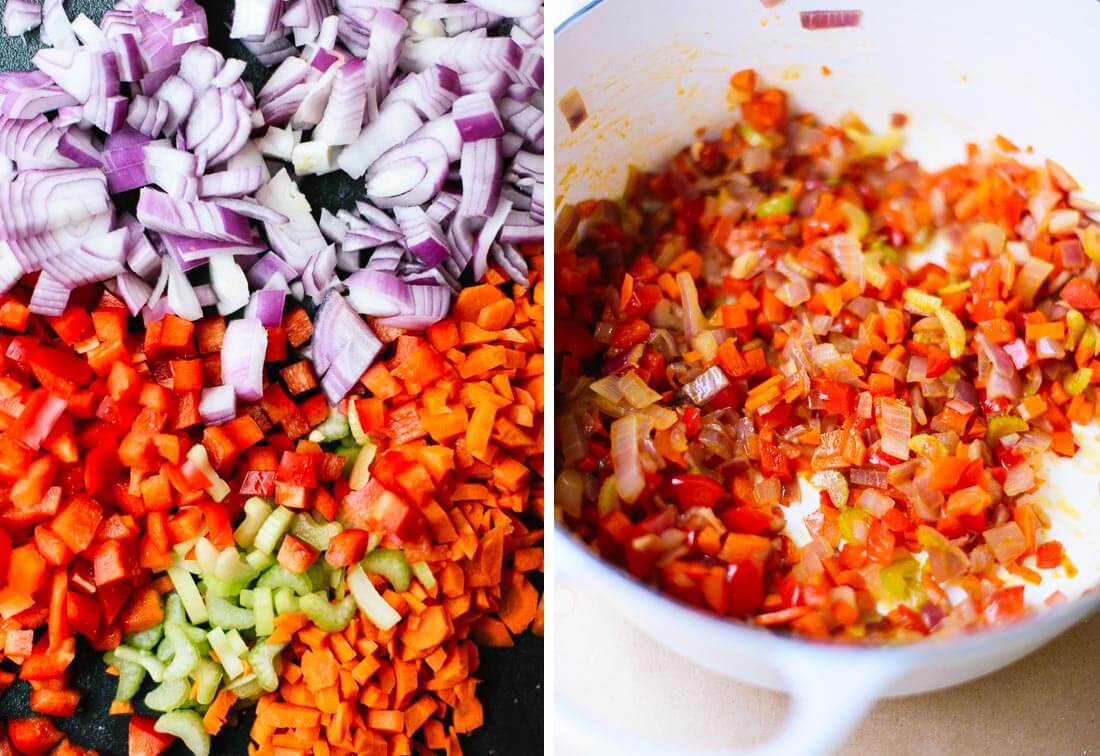
In a medium skillet, heat 1 tablespoon of the olive oil. Add the onion, season with salt and pepper. Cover and cook over moderate heat, stirring occasionally, until golden brown, about 10 minutes. Let cool.
Step 3 
In a large bowl, combine the orange juice, orange zest, lemon juice, garlic and the remaining 3 tablespoons of olive oil; season with salt and pepper. Add the quinoa, rice, onion, and shaved beets. This can sit for 1-2 hours before serving. Add apricots, pistachios and scallions and lettuce just before serving.
Make Ahead
The cooked quinoa and rice and the dressing can be refrigerated separately overnight. Bring to room temperature before proceeding with the recipe.

Tandoori-Style Chicken

Recipe from J. Kenji Lopéz-Alt at Serious Eats – The Food Lab

Notes

The moment that Red theme was drawn my gut instinct was to make Tandoori Chicken. When it was determined that Red theme night would be held at our place, I went straight to the Serious Eats site figuring that they may have a recommendation as to how to make the dish without owning a Tandoor oven.

Serious Eats noted that the special feature of the oven is that it can get to 900°F which you can achieve at home using a conventional charcoal grill. I used these Weber Char Baskets to bundle the coals just an inch or so under my grill to get it the hottest possible temperature. I was very happy with the results, and the marinate seemed to be spot-on to replicate this dish.

The spice blend calls for toasted ground cumin, toasted paprika, and toasted ground coriander seed. We toasted these ourselves in a shallow frying pan until the oils were released and then allowed them to cool.

Ingredients

    • 4 Cornish game hens, about 1½-pounds each
    • 2 tablespoons toasted ground cumin
    • 2 tablespoons toasted paprika
    • 1 tablespoon toasted ground coriander seed
    • 1 teaspoon ground turmeric
    • ½ teaspoon cayenne pepper
    • 1 tablespoon achiote or a few drops red food coloring (optional)
    • 8 cloves garlic, grated on a microplane grater
    • 2 tablespoons fresh ginger, grated on a microplane grater
    • 2 cups yogurt
    • ½ cup lemon juice
    • ¼ cup kosher salt
    • Thinly sliced raw onion
    • ½ cup roughly chopped cilantro leaves
    • 2 lemons or limes, cut into wedges

Directions

  1. Toast the ground cumin, paprika, and ground coriander seeds in a shallow frying pan until the oils are released. Move to a bowl and allow to cool.
  2. Using sharp kitchen shears, remove the backs from the Cornish hens. Press down firmly on center of breasts until wishbone cracks and they lie flat.
  3. Peel skin off of hens, then using a sharp knife– Tandoori chicken is traditionally cooked with the skin off. While for most methods of cooking chicken this would be a bad idea (skin is an insulator that prevents dry breast meat from becoming tough or stringy), with tandoori chicken, the thick yogurt-based marinade helps to prevent the meat from drying out.
  4. Make deep incisions at 1-inch intervals all over the flesh. By slashing it with a sharp knife at regular intervals along its surface (make sure to slash against the grain), you greatly increase the area in which the marinade can flavor it.
  5. Arrange legs so that they are pointing up towards the top of the breast. Use two long metal or wooden skewers (don’t expect them not to burn in the high heat needed for this type of cooking) to secure legs and breasts in place. Place in a large rimmed baking dish.
  6. Combine cumin, paprika, coriander, turmeric, cayenne, achiote or red food coloring, garlic, ginger, yogurt, lemon juice, and salt in a large bowl and whisk to combine. Pour marinade all over Cornish hens, using hands to coat every surface. cover loosely and refrigerate. Refrigerate and allow to marinate for at least 4 hours and up to 8, turning occasionally.
  7. Ignite a large chimney starter full of charcoal and allow to burn until all coals are ignited. Spread coals evenly under one side of grill (or use char baskets) and set grill grate in place. Cover and allow to preheat for 5 minutes. Brush grill grates clean.
  8. Wipe excess marinade off of hens then place meaty-side down directly over the coals. Cover partially and allow to cook until deeply charred on first side, 7 to 10 minutes. Flip and continue cooking until hens register 145°F in the thickest part of the breast and 165 to 170°F in the legs, about 5 minutes longer (for larger chickens, transfer to cooler side of grill, cover, and continue cooking until desired temperature is reached). I use a wireless dual-probe thermometer for cooking on the grill– I put one probe in the largest breast, one in the largest thigh, and set my receiver to the appropriate temperatures.
  9. Remove hens to a large cutting board, tent loosely with foil, and allow to rest for five minutes. Remove skewers and using a heavy knife or cleaver, chop each hen into 8 serving-sized pieces. Serve immediately with onions, cilantro, and lemon wedges.

Red bean Vegetarian Chili stuffed in Red Bell Pepper

  • Author: Cookie and Kate (for chili)
  • Prep Time: 20 mins
  • Cook Time: 40 mins
  • Total Time: 1 hour
  • Yield: 4 to 6 servings
  • Category: Chili
  • Cuisine: American

This chili probably made enough for 6 huge peppers, I doubled it and had a ton of extra.

The smoky, complex flavor of this simple vegetarian chili comes from basic pantry ingredients, vegetables and spices! It makes great leftovers, too. This chili recipe is gluten free as written (just be sure your garnishes are also gluten free), and vegan (unless you top it with dairy products like sour cream or cheese). Recipe yields 4 large or 6 moderate servings of chili.

INGREDIENTS

  • 2 tablespoons olive oil
  • 1 medium red onion, chopped
  • 1 large red bell pepper, chopped
  • 2 medium carrots, chopped
  • 2 ribs celery, chopped
  • 1/2 teaspoon salt, divided
  • 4 cloves garlic, pressed or minced
  • 2 tablespoons chili powder*
  • 2 teaspoons ground cumin
  • 1 1/2 teaspoons smoked paprika*
  • 1 teaspoon dried oregano
  • 1 large can (28 ounces) or 2 small cans (15 ounces each) diced tomatoes**, with their juices
  • 2 cans (15 ounces each) black beans, rinsed and drained
  • 1 can (15 ounces) pinto beans, rinsed and drained (I used red beans instead)
  • 2 cups vegetable broth or water
  • 1 bay leaf
  • 2 tablespoons chopped fresh cilantro, plus more for garnishing
  • 1 to 2 teaspoons sherry vinegar or red wine vinegar or lime juice, to taste
  • Garnishes: chopped cilantro, sliced avocado, tortilla chips, sour cream or crème fraîche, grated cheddar cheese, etc.

INSTRUCTIONS

  1. In a large Dutch oven or heavy-bottomed pot over medium heat, warm the olive oil until shimmering. Add the chopped onion, bell pepper, carrot, celery and 1/4 teaspoon salt. Stir to combine and then cook, stirring occasionally, until the vegetables are tender and the onion is translucent, about 7 to 10 minutes.how to make vegetarian chili
  2. Add the garlic, chili powder, cumin, smoked paprika and oregano. Cook until fragrant while stirring constantly, about 1 minute.
  3. Add the diced tomatoes and their juices, the drained black beans and pinto beans, vegetable broth and bay leaf. Stir to combine and let the mixture come to a simmer. Continue cooking, stirring occasionally and reducing heat as necessary to maintain a gentle simmer, for 30 minutes. Remove the chili from heat.
  4. For the best texture and flavor, transfer 1 1/2 cups of the chili to a blender and blend until smooth, then pour the blended mixture back into the pot. (Or, you can blend the chili briefly with an immersion blender, or mash the chili with a potato masher until it reaches a thicker, more chili-like consistency.)
  5. Add the chopped cilantro, stir to blend, and then mix in the vinegar, to taste. Add salt to taste, too—I added 1/4 teaspoon more at this point. Divide the mixture into individual bowls and serve with garnishes of your choice. This chili will keep well in the refrigerator for about 4 days (I haven’t tried, but I bet it would freeze well, too).

The best vegetarian chili - so easy to make with basic ingredients! cookieandkate.com

NOTES

Recipes consulted during the making of this recipe: vegetarian chili with winter vegetables (The New York Times), vegetarian chili (Saveur) and winter vegetable chili (Food and Wine). 
This is very good chili

  1. Slice the tops off peppers and remove seeds. and white pith
    Slice thin layer off the bottom to help them stand up straight. (if necessary)
    Scoop chili mixture into peppers.
    Stand peppers in a glass baking dish. replace top on peppers
  2. Cover with foil and bake at 375 degrees for 40 minutes.
  3. Remove foil and sprinkle cheese (I used pepper jack cheese) then bake for another 5-10 minutes until cheese is starting to brown
  4. Sprinkle with cilantro